Make hundreds of plants from one (yes, you sure can)
 Yes, you can literally turn one plant into hundreds of plants, if it’s the right plant. Many common herbs can be easily re-created by taking simple cuttings off of their new stems and rooting them in a sandy potting soil.
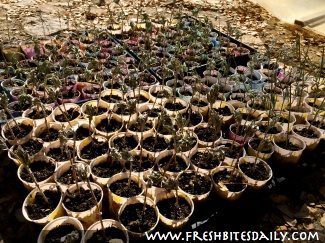
I used this method recently to turn a hearty Cleveland sage plant into 150 cuttings. (You can see why I love this sage so much; it helped me survive the Grand Jury *cough*.) Most of those cuttings will root and become new plants. To be clear, the one hearty sage plant is still strong and hearty this is not injure the plant itself. In fact, it is an obvious task to perform when an herb needs to be pruned anyway.
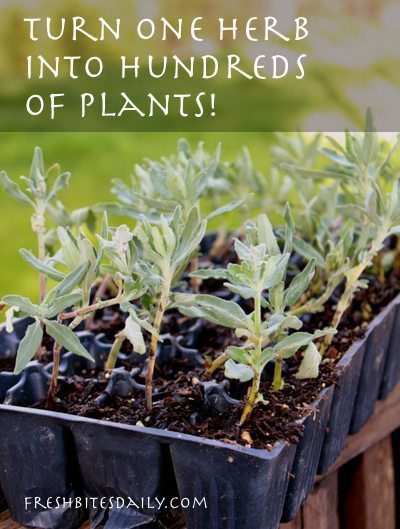
While I was at it and creating a new sage plants, I took cuttings of lavender and a more ornamental sage plant and, as you can see, I have an abundance of small readings under a little greenhouse box. Some of these plants I will plant on our northwest corner and others will fill an area burned by our recent forest fire.
Let me explain the simple process, a process best started in the spring (but there is no reason not to plan now).
First, you can use this process for many herbs and really for many shrubby plants. We have started many herbs from cuttings: rosemary, oregano, sage, lavender, tarragon, mint, marjoram, and more.
 Select a new stem from the plant, not overly woody but also not so delicately new. A good rule of thumb is to select a stem that could break off but does not bend and “flop” on its own. You want a nice fresh new growth stem with a bit of leaf, though you will see you will be removing a good bit of the leaf if it is a leafy stem. We took these cuttings in the fall, but this project is best done in the spring in many areas unless you have a greenhouse to protect your cuttings from the winter cold. I should also add that they will only root and grow if they are living in growing conditions for the herb itself. If the conditions are too cold to support growth of that plant type, the cuttings will just sit there. Spring through summer is definitely the best time for this project in many areas.
Using shears that are cleaned with alcohol (to reduce molding), cut the stem that is about 4 inches in length. Gently remove all but the top leaves of the stem as we did here in the picture. Cut off any flowers. I prefer to use sharp pruning shears instead of just “ripping” the leaves off with my fingers — it tends to be more gentle on the plant. At the base of the stem, the base that you hope will grow and form a root in the new root of your plant, use sharp shears to make a cut diagonally. What I usually do is take a lot of cuttings from an herb and then sit at a table and cut them again to length making a diagonal cut with each with sharp shears as I do so. At that time I also remove the rest of the leaves. I set the cuttings aside for a day to allow the root ends to cure overnight.
For the soil medium, your best bet is to purchase a mix made for the project. You can find “rooting medium” at any nursery. It is sterile and you will have a very high success rate. The herbs I root are so hardy that I have also used a mixture of potting soil and sand in a ratio of about 20% sand to 80% potting soil, I add moisture as necessary, and fill up a bunch of little cups with the mixture. Typically, I use something like a Dixie cup and use a sharp knife to pierce it maybe three times to provide drainage for the plants. I fill each of these cups with my soil mixture and then gently place the cutting into the soil with the cut end down. I water each cup gently.
 For the soil medium, your best bet is to purchase a mix made for the project. You can find “rooting medium” at any nursery. It is sterile and you will have a very high success rate. The herbs I root are so hardy that I have also used a mixture of potting soil and sand in a ratio of about 20% sand to 80% potting soil, I add moisture as necessary, and fill up a bunch of little cups with the mixture. Typically, I use something like a Dixie cup and use a sharp knife to pierce it maybe three times to provide drainage for the plants. I fill each of these cups with my soil mixture and then gently place the cutting into the soil with the cut end down. I water each cup gently.
If you’ve taken your cuttings in cold weather, you’re cuttings will probably need some kind of protection from the cold, as mine do under a greenhouse.
The key to success is to keep your cuttings moist. They will probably require daily watering by hand to stay moist and to allow the roots to grow, especially if they are potted in something as small as a Dixie cup. I should add that the cuttings are rather delicate so you do not want to water them with an open hose or something that’s going to disturb the plant material itself. I recommend using a nozzle on the hose that has a delicate mister or a very gentle watering can with a small spout to water each cutting. Water your cuttings daily for a few weeks until they are ready to be transplanted either into larger planters or in the ground.
In my case, these cuttings will be in pots for about a year because I do plan to plant them on an open hillside with little protection. Once they are a year old, they should do well on that hillside. If I planned to put them in landscape beds where they might be better protected from the weather and from deer stampedes, I might plant them in the ground sooner than that. In any case, use your judgment. I always over-plant my cuttings because not all will make it. Though actually the success rate for most herbs is fairly high, some gardeners boast a 100% success rate. Like I said, I always over plant.
 My success rate may be more like 90% but I have also never felt like I just planted way too many and “what will I ever do with them?” My point is that cuttings are cheap and I seldom have regrets.
Source: Fresh Bites Daily


